Recently I finally completed my first computer-drawn diagram featuring one of my most queried models, Seigaiha without cuts. It was quite an interesting task and I really learned a lot from it. In this article, I would like to share some of my thoughts on drawing diagrams.
The diagram is for sell on my Ko-fi shop, but you can preview the results here.
Inkscape
I drew this diagram using Inkscape, which, despite it being free and open-source software, is less chosen for professional diagramming as much as I know. Perhaps that is due to the fact that many designers have found it difficult to use for various reasons. In contrast, commercial vector drawing software such as Adobe Illustrator or Affinity Designer are more popular choices. But Adobe apps are well-known for their relatively higher prices, while Affinity Designer, though much cheaper and are promoted by a group of origami designers, simply doesn't feel intuitive enough to me (it definitely could be just me, since I didn't spend much time digging into it either). I was hoping that a completely free solution could exist, but when it comes to free and fully-featured vector drawing apps, Inkscape is pretty much the only one on the market, and previously I also would agree that it just doesn't cut it.
However, I would say that things are about to change. Recently the development of Inkscape has become really active, and many improvements have been done in the upcoming version 1.2 (still in beta as of this writing), including performance (Inkscape used to be REALLY slow; not anymore!), multiple page support (and can be saved as multi-page PDF directly), and various bug fixes. Although the beta version still contains bugs (which I am constantly reporting myself) and it still lacks a few features that I think will make it even more suitable for origami diagramming, I could pretty much testify that version 1.2 beta is good enough for creating professional diagrams.
You can download Inkscape 1.2 beta here. It works for all desktop platforms from Windows, Mac OS to Linux.
Basic configuration
In order to make Inkscape suitable for drawing origami diagrams, the most important setting is the rotation snapping as shown in the following picture. By setting the value to 22.5 degrees, the lines we draw will automatically snap to an angle that is a multiple of 22.5 degrees when we hold Ctrl key. You could also change it to 30 or 15 degrees when your model is 30-degree based.


However, Inkscape unfortunately doesn't provide 11.25 degrees as one of the options. I personally found the easiest way to create a line in 11.25 degrees is by first drawing a vertical line, rotating it by exactly 11.25 degrees (using the rotation transform in the Transform dialog), and then resize it to the length I need (by holding Ctrl as I resize it). For this method to work, it is also very important to keep the "Scale stroke width" option unchecked, so that resizing a line will not affect its width.


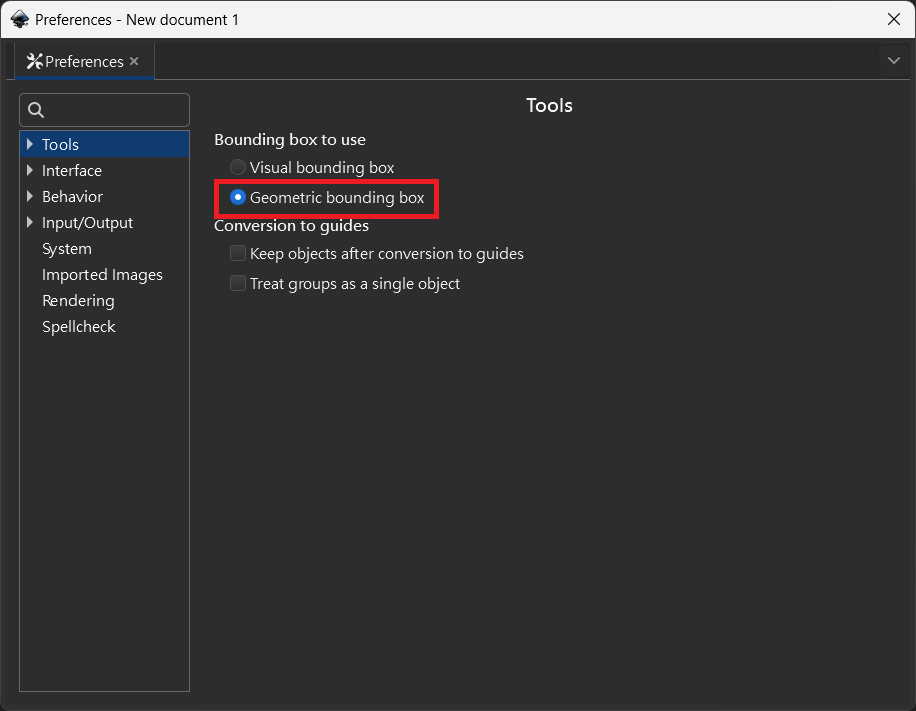
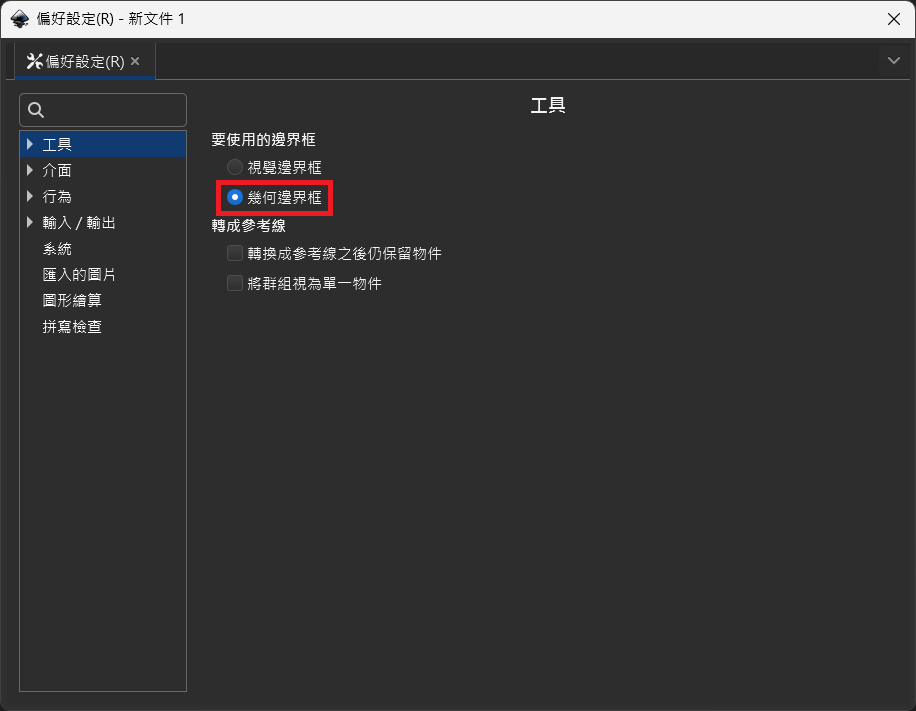
You would also need to set the bounding box to geometric mode for this to work. Otherwise, the direction of the line will actually change slightly as one resize it.


The perfect mountain-fold line pattern
It is conventional to draw the mountain-fold line in a chain pattern (dash-dot-dash, or sometimes dash-dot-dot-dash), as shown in the next picture. The first one is the line pattern one will find in most of today's literature, where the "dot" is really a tiny square of the same size as the width of the "dash" part. To me, that's simply not quite satisfying. I want the dot to be a circle instead, and it should be slightly larger than the width of the dashes, as shown in the second line pattern.

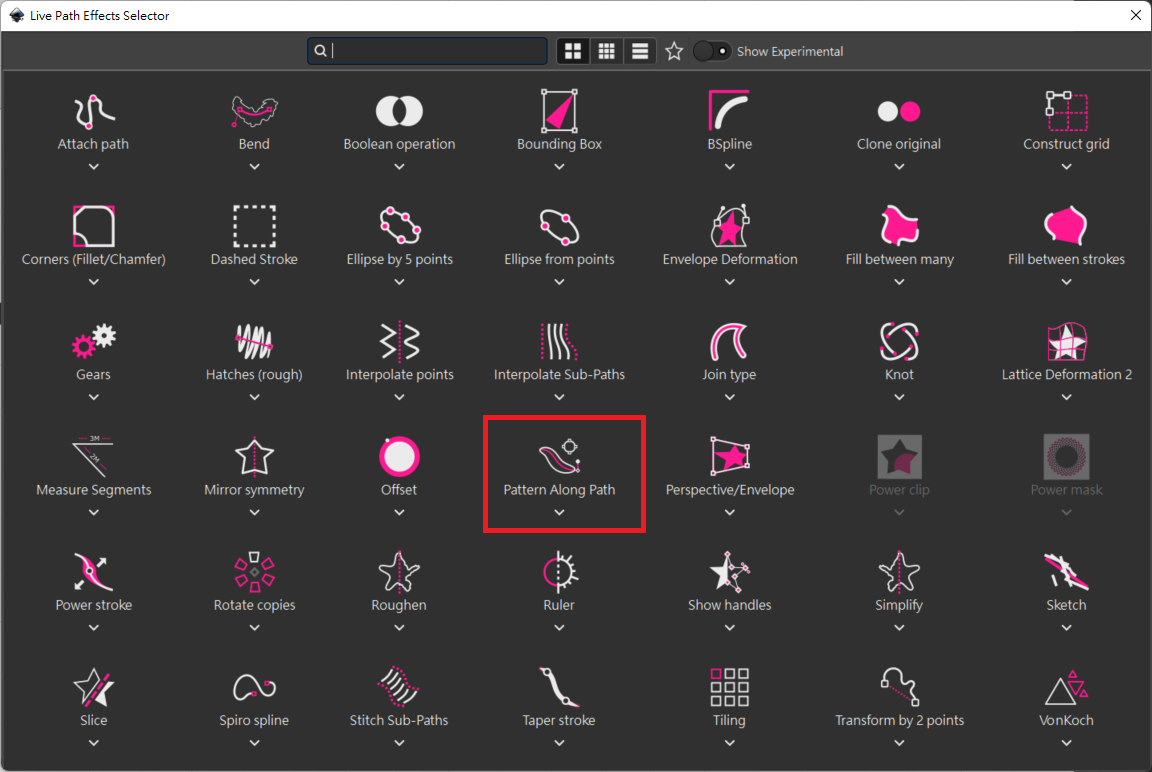
The good news is that Inkscape does provide a function called "Pattern along path" that enables us to create such a line pattern. To use it, we need to first create a "sample pattern" as shown in the next picture. Notice that it is a single path object (not a group of objects!) consisting of multiple subpaths (you could use path-union to create such an object), and it must be a filled path without stroke width.

Once you create the sample, copy it into the clipboard. Next, draw a line as usual, and then go to Path → Path Effects to open the Path Effects dialog, click the plus-sign button to add an effect, and select "Pattern along path".

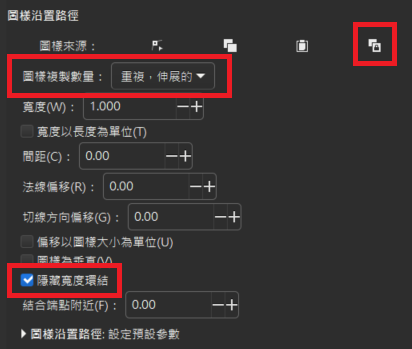
Now click on "Link to path in clipboard" (which is the upper-right button in the next picture) and select "Repeated, stretched" in "Pattern copies". This will create exactly the type of line we want (make sure that the line itself is filled with black, and has no stroke color). It is also helpful to check the "Hide width knot" option so that only the end-point knots are shown when we edit the path. Of course, there's no need to repeat this process every time we want to draw a mountain line; once we created one, just duplicate it as we need.


One bonus upside about drawing patterned lines this way is that the pattern is "stretched" automatically, which means that no matter how long the line is, it will always contain exactly an integral number of repetitions of the sample pattern (as shown in the next picture). In our particular case, that means the line will always end in the "dash" part and never in the "dot" part. I've found this property to be extremely satisfying, as I would often need to adjust the "pattern offset" of a line by using the native stroke pattern mechanism.
Drawing arrows and symbols
The template file also contains the symbols I used in my diagram, and you can access them from the Symbols dialog.

One important note: as of this writing, due to a bug in Inkscape (which I have reported here), if you copy and paste a line that has a marker, it will create a duplicate entry in the marker list, which is pretty annoying. In order to avoid that, the workaround is to use "duplicate" (hotkey Ctrl + D) and then move it to the new location instead of copy and paste.
Creases stop before reaching the edges
It is conventional that creases, usually drawn in thin lines, stop before they reach edges (folded or raw). I think the way most people do that is by manually shrinking each line slightly; I think so because I often observe that they missed adjusting a few lines here and there. Doing this type of manual adjustment has at least three downsides:
- It is quite inefficient, obviously.
- It is hard to make the gap width consistent.
- By doing so, the crease lines no longer intersect the edges. Those intersections could otherwise be quite useful for snapping.
A much better way to do this is by using clip paths to make the crease lines invisible near the edges. It only takes a few operations to handle all creases in an edge polygon at once, with consistent gap width, and the intersections are all kept for further use. In Inkscape, this can be done by the following steps:
- Select an edge polygon and duplicate it (default hotkey Ctrl + D).
- Use the inset command (default hotkey Ctrl + )) to shrink it. I usually perform it twice for most edge polygons, and once for smaller polygons.
- Select one of the crease lines and the shrunk polygon (making sure that the polygon is above the line), and perform
Object→Clip→Set. (This command has no default hotkey. I set personnaly it to Shift + C.) Doing so will create a clipped group. - Select the rest of the crease lines and move them into the clipped group in the Objects and Layers dialog.
Alternatively:
- Select all crease lines in the polygon and group them (default hotkey Ctrl + G).
- Select the group and the shrunk polygon, and set the clip the same way. This creates a new group around the said group. You can then ungroup the said group to simplify the hierarchy (however, I've found that keeping the extra grouping is helpful for future editing as well).

Make use of clone objects
It is commonly the case that later on we find some mistakes that took place in a much earlier step, and the error was copied and pasted throughout all the following steps. Clone objects could make our lives easier. It keeps the clone identical to the original object (can be a group) even if we modify the original object later on, so if we find any error, we only need to make the correction once. Clone objects can be created by the hotkey Alt + D.
Layer management
I use at least three layers in my document, which I call base, action, and reference. The base layer is where most of the drawings (paper layers, edges, existing creases, and text) take place. The action layer includes things that represent the operations in the current step (mountain/valley folds, arrows, and symbols). I put these into a separate layer so that I can easily skip those objects when I copy and paste the previous view to the next (all I have to do is temporarily lock the action layer, and drag-select everything in the previous step). Finally, the reference layer is where I put photos of my test piece for tracing complicated 3D steps. I will set the photos to about 30% opacity, lock the layer and trace it. After I'm done, I can just make the entire layer invisible and continue.
Styling
I use A4 size pages for this particular diagram, which is probably not ideal for physical publications, but it certainly works for digital ones.
I use three different line width:
- 0.1mm for existing creases.
- 0.2mm for edges.
- 0.3mm for things in the action layer.
This is roughly based on the suggestions given by Nicolas Terry, and having them in a progression makes it easy to change the storke width by just clicking the plus/minus buttons in the Fill and Stroke dialog.
I use 3mm Arial Font for normal text, filled with black and without stroke. Then bold font for the step index.
The color side of the paper is set to 30% gray, and the shades are black with 30% opacity.


Recent Comments